Give Access Permissions to the Scorecards and KPIs
Share scorecards with your team. Give access to the selected groups, whole scorecards, or specific indicators.
Access Rights via Ownership
Users assigned as owners to goals, indicators, and initiatives are automatically granted access rights according to their user type.
To assign an owner to a goal or indicator:
- Open any scorecard
- Select any goal or indicator, and switch to the General tab below
- Use the Owner control to assign an owner

To assign an owner to an initiative:
- Open any scorecard
- Open an existing initiative or create a new one
- Use the Owner control to assign an owner
Adding Access Rights
Follow these steps to give a user a new access rights.
- Go to the
 > Strategy Workspace > My Scorecards
 - Select the group or the scorecard that you want to work with
- Click on the Share button on the toolbar:
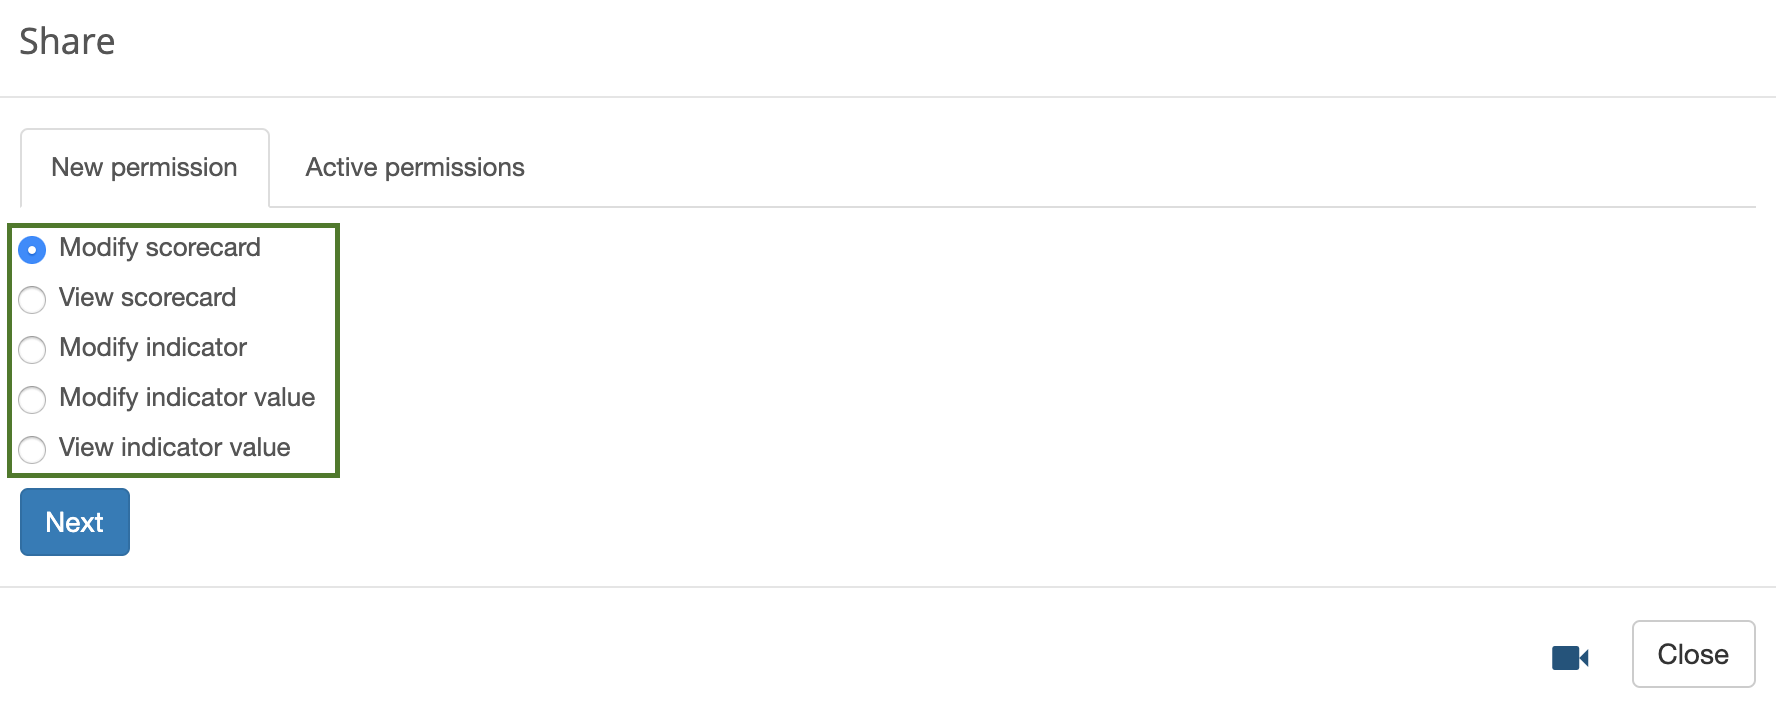
- On the Share page select the rights that you want to assign to the user and click on the Next button.
- Find the user that you want to work with. Next to the user's name find the type of access that you want to give to the user and click on the Grant button.


Users who have access to this scorecard will now see it in their account in an organizational structure.
Revoke Access Rights
To revoke access rights follow the steps 1-3 as described above.
- Go to the Active permissions tab
- Next to the user's name press the Revoke button
Public Access
With BSC Designer you can make a public scorecard. To give public access on the step 5 find Public user and give that user required rights.
Access by Email
In some cases you might want to give an access to the person who is registered with BSC Designer, but is not linked to your account. In this case on the step 5 use section Grant rights for email, and specify the email of the person.